
Note: I apologize for the lack of
Part 1 – Deploying a containerized application from a GitHub image.
I will be using the docker toolbox to create a containerized application using an image available on GitHub.
The docker toolbox includes Oracle virtual box, (which creates the tiny core VM, with docker pre-installed) the docker quick start terminal, and Kitematic, a GUI based dashboard.
A docker Machine is a tool that lets you install the docker engine on a virtual host, and manages the hosts with docker-machine commands. You can use the machine to create docker hosts on your local Mac or Windows box, on a company network, in a data center, or on cloud providers like Azure, AWS, or Digital Ocean.
Once the default docker machine is created, you can use “docker-machine ssh default” to connect to the default virtual machine with a docker environment, from within your local terminal.
I will use the popular Azure voting app as my example application, which I hope to deploy into a k8s cluster in Azure.
First I will download the container image from git hub.
git clone https://github.com/Azure-Samples/azure-voting-app-redis.git
Move to the directory
cd azure-voting-app-redis
Even though the machine has docker pre-installed you will need to install docker-compose separately to be able to build and run the container.
Install compose
sudo curl -L "https://github.com/docker/compose/releases/download/1.23.2/docker-compose-$(uname -s)-$(uname -m)" -o /usr/local/bin/docker-compose
sudo chmod +x /usr/local/bin/docker-compose
docker-compose up -d
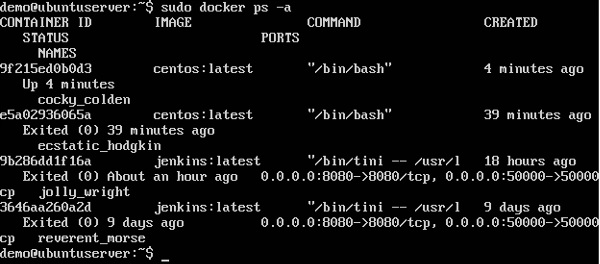
use docker images to see the images downloaded and docker ps to see running containers.
Exiting out of the VM, executing docker-machine env will get you the virtual local IP address assigned to the container on port 80 for the voting application. navigating to http://local_IP:8080 should direct you to the voting app site.
Still, this is just a test run to try the application image on a single container locally. Next, we will tag and upload the image to the Azure container registry (ACR).
Part 2 – Upload Container image to Azure Container registry.
I built the container registry using the portal. You are able to create the Azure Container registry using Azure CLI.
- Resource group : ravsalgado_AKS_app1
- Container registry :aksreg1
Note: If enabled, you can use the registry name as a username and admin user access key as a password with docker to login to your container registry. You should also note the name of your registry. In my case it is myresg1.azurecr.io
You could use Azure CLI to upload the image to the Azure container registry or use docker cmds. I have used the docker cmd below.
docker login myresg1.azurecr.io -u (username = registry name) -p password=key)
Once you have successfully logged in to the ACR, You can go ahead and tag the image you would like to use to create your containers before pushing them into the registry, then you will use the docker push cmd to push the image to the registry.
docker tag azure-vote-front aksresg1.azurecr.io/azure-vote-front
docker push aksresg1.azurecr.io/Azure-vote-front
Part 3 – Installing Azure CLI
You will be configuring and manipulating Azure resources throughout the deployment of the cluster. as such Azure CLI is a vital tool to have on the machine that you use to build and deploy container images.
Since the docker machine I am using is a tinycore VM, I will be utilizing the script available here to install Azure CLI. For other distributions you will be able to find directions here.
installing Python and Open SSL (OpenSSL is installed by default)
tce-load -wi python curl https://bootstrap.pypa.io/get-pip.py
installing libffi
git clone git://github.com/libffi/libffi.git
Once these prerequisites are met you can move into installing Azure CLI. The first step in this process will be to download the script into your machine. You could also copy and p
curl -O https://aka.ms/InstallAzureCli
I Created a file named InstallAzureCli and used vi editor to edit the InstallAzureCli file. I Copied the text available at https://aka.ms/InstallAzureCli. Then edited the following line to include 6Xs instead of the 4. once edited saved with wq!, and ran the script. You might also have to take out all the inline comments at the very top.
This is due to a bug Microsoft is aware of that will be corrected in the next release.
install_script=$(mktemp -t azure_cli_install_tmp_XXXXXX) || exit
Run the script file.
- chmod +x InstallAzureCli
- ./InstallAzureCli
If you go with the default values, make sure to go in to the .docker/bin/az file to run the az execution file.
- cd .docker/bin
- ./az
You should also restart your shell session with
- exec -l $SHELL
You will also need to update the $PATH with the location of the AZ execution file.
- check what the $PATH is with echo $PATH.
- To edit $PATH
- vi .bashrc
- edit: export PATH=”$PATH:/path/to/dir”
- save with wq!
- apply the change with source ~/.bashrc
Once this is done you should be able to run the AZ –version to check if az is functional.
Login with az -login
az login -u globaladmin@ravsalgado.com -p ********
This doesn’t work with Microsoft accounts or accounts that have two-factor authentication enabled.
Part 4 – Creating a Kubernetes Cluster
This process is primarily to create the k8s cluster infrastructure. You have several options of going about it. You can use Azure CLI, as per instructions here, or utilize the portal to cerate the cluster. I used the GUI this time.
Creation of the cluster consists of 5 sections.
Basic
You will be able to configure the number of worker nodes you would want to create. This as mentioned in my previous article will be virtual machines. Based on your resource needs you will have the option of selecting the SKU of the VMs you would designate to be worker nodes.
One of the features in preview that could be enabled in this section is Virtual Node. This allows you to build your nodes using Azure Container instances, vs the VMs in IaaS.
- Kubernetes cluster name:Votingapp
- DNS Prefix: Votingapp
- Virtual node disabled.
- Number of nodes :3 (3 virtual Machines in the SKU of your choosing)
Authentication
The cluster infrastructure service principle is used by the K8s cluster to manage cloud resources in the cluster. You also have the ability to enable RBAC for more granular control of resources. If you would like to have more control of the service principle you can create and configure the user separately. We will be looking into the service principles configuration further, later on.
- Default service principle
- RBAC enabled
Networking
There are two networking configuration options available, basic and advanced. I decided to use advanced to go through all of the configuration options available.
- Vnet name: ravsalgad_AKS_app1-vnet
- Cluster subnet : 10.240.0.0/16
- Kubernetes cluster IP range: 10.0.0.0/16
- Kubernetes DNS IP address: 10.0.0.10
- Docker Bridge address:172.17.0.1/16
HTTP application routing: Disabled – HTTP application routing solution makes it easy to access applications that are deployed to your cluster by creating publicly accessible DNS names for application endpoints. This will create a DNS zone in your subscription. HTTP application routing is designed for easily getting started with ingress controllers and as such is not recommended for production clusters.
Monitoring
once enabled it will automatically create a log analytic workspace. You can find more information about Kubernetes monitoring here.
Tags
These are Azure tags, separate to how a container image can be tagged.
Part 5 – Configuring the cluster nodes
As mentioned previously, you will be communicating with the master node using Kubectl, and in this case kubectl will be used to communicate with the AKS service.
Since the image from our voting-app has been uploaded to ACR, you will need to make sure that the AKS can access the ACR. To do this we will need to make sure that the service principle we created in the authentication section of our K8s cluster creation has the authorization to pull images off of ACR.
First we will obtain the ID for the ACR.
az acr show --resource-group ravsalgad_AKS_app1 --name aksresg1 --query "id" --output tsv
/subscriptions/e9e5f0a4-4fea-4ad7-be0f-f09d65838296/resourceGroups/ravsalgad_AKS_app1/providers/Microsoft.ContainerRegistry/registries/aksresg1
Next we will need to find the service principle that was created.
You can do this by going through the portals, Azure AD > App registration > all Apps. But if it was created with default values rather than being assigned as I did, you might have trouble identifying the service principle. In such a scenario run:
az aks list --resource-group ravsalgad_AKS_app1
Which will return: Client ID/application ID: 6979b371-4eff-4578-be8a-247ad7c24e16
The following code assigns the service principle from AKS the permissions to pull images in ACR.
az role assignment create --assignee 6979b371-4eff-4578-be8a-247ad7c24e16 --scope /subscriptions/e9e5f0a4-4fea-4ad7-be0f-f09d65838296/resourceGroups/ravsalgad_AKS_app1/providers/Microsoft.ContainerRegistry/registries/aksresg1 --role acrpull
NOTE: You can also do this via the portals role assignment for the ACR resource.
communicating with the cluster node
Install Kubectl.
curl -LO https://storage.googleapis.com/kubernetes-release/release/$(curl -s https://storage.googleapis.com/kubernetes-release/release/stable.txt)/bin/linux/amd64/kubectl
chmod +x ./kubectl
sudo mv ./kubectl /usr/local/bin/kubectl
Get AKS credentials to be able to communicate with the specific AKS Cluster.
az aks get-credentials --resource-group ravsalgad_AKS_app1 --name Votingapp
This allows for the local kubectl running on your local machine to be applied to the master node (In this case Azure). Now if you run Kubectl get nodes you should be able to see the worker nodes in your cluster.
Part 6 – Deploying the Application
The manifest file (.YAML) instructs the order of resource creation and configurations. When we downloaded the azure-vote-app-redis, the azure-vote-all-in-one-redis.yaml file was also downloaded.
You can view the full.yaml file here.
Since the yaml instructions will be used to build the architecture of the containers and pods (Note: This is limited to container and pods and not the nodes). You will need to update this yaml file to use the image that now resides in ACR before using it to deploy the app.
You will need to obtain the name of the ACR server if you didn’t note it during creation. This can be done by executing:
az acr list --resource-group ravsalgad_AKS_app1 --query "[].{acrLoginServer:loginServer}" --output table
AcrLoginServer
——————-
aksresg1.azurecr.io
The changes in the .yaml file are as follows:
Note: Make sure the Azure-vote-front image that was uploaded to your ACR has the same tag as V1 or edit as needed.
Deploy the app architecture
kubectl apply -f azure-vote-all-in-one-redis.yaml

Use Kubectl get nodes to see if all containers are running.
You would also use kubectl get service azure-vote-front –watch to find the public/External IP address of the azure-vote-frontend site. By navigating to this address you should be able to view the voting app.
To Access individual pods use:
Find pod name with: kubectl describe pods
Access pod: kubectl exec -ti $POD_NAME bash
The .Yaml file will clearly break out the deployments, with a replica set with one pod each, a section for each component (the front end and backend) as well as each of the services that accompany the containers.
You would by now have noticed that other than for the infrastructure that the cluster runs on, the cluster configuration is primarily done by the azure-vote-all-in-one-redis.yaml manifest file. The application frontend (the site), and the radis backend image, are all configured to work together. AKS only provides the infrastructure to efficiently run your cluster. I would highly recommend taking a look at the full GitHub repository for the Azure voting app to see how these components all work together.